
Payees
A payee is who you paid or who paid you: a supermarket, your landlord, your employer. Linking transactions to payees lets you see how much goes to each one, and lets a payee fill in the category and tags for you.
Payees come from three places:
- You pick or create one in the transaction form.
- You create one on the Payees page.
- MoneyMatter creates them automatically from the merchant names on bank-synced and imported transactions. See automatic payee detection.
Open your payees
Section titled “Open your payees”- Click the gear button (Settings) at the top right of the app.
- Under Workspace, choose Payees.
The page has two tabs: Manage, the list of your payees, and Settings, which controls automatic detection.
The payee list
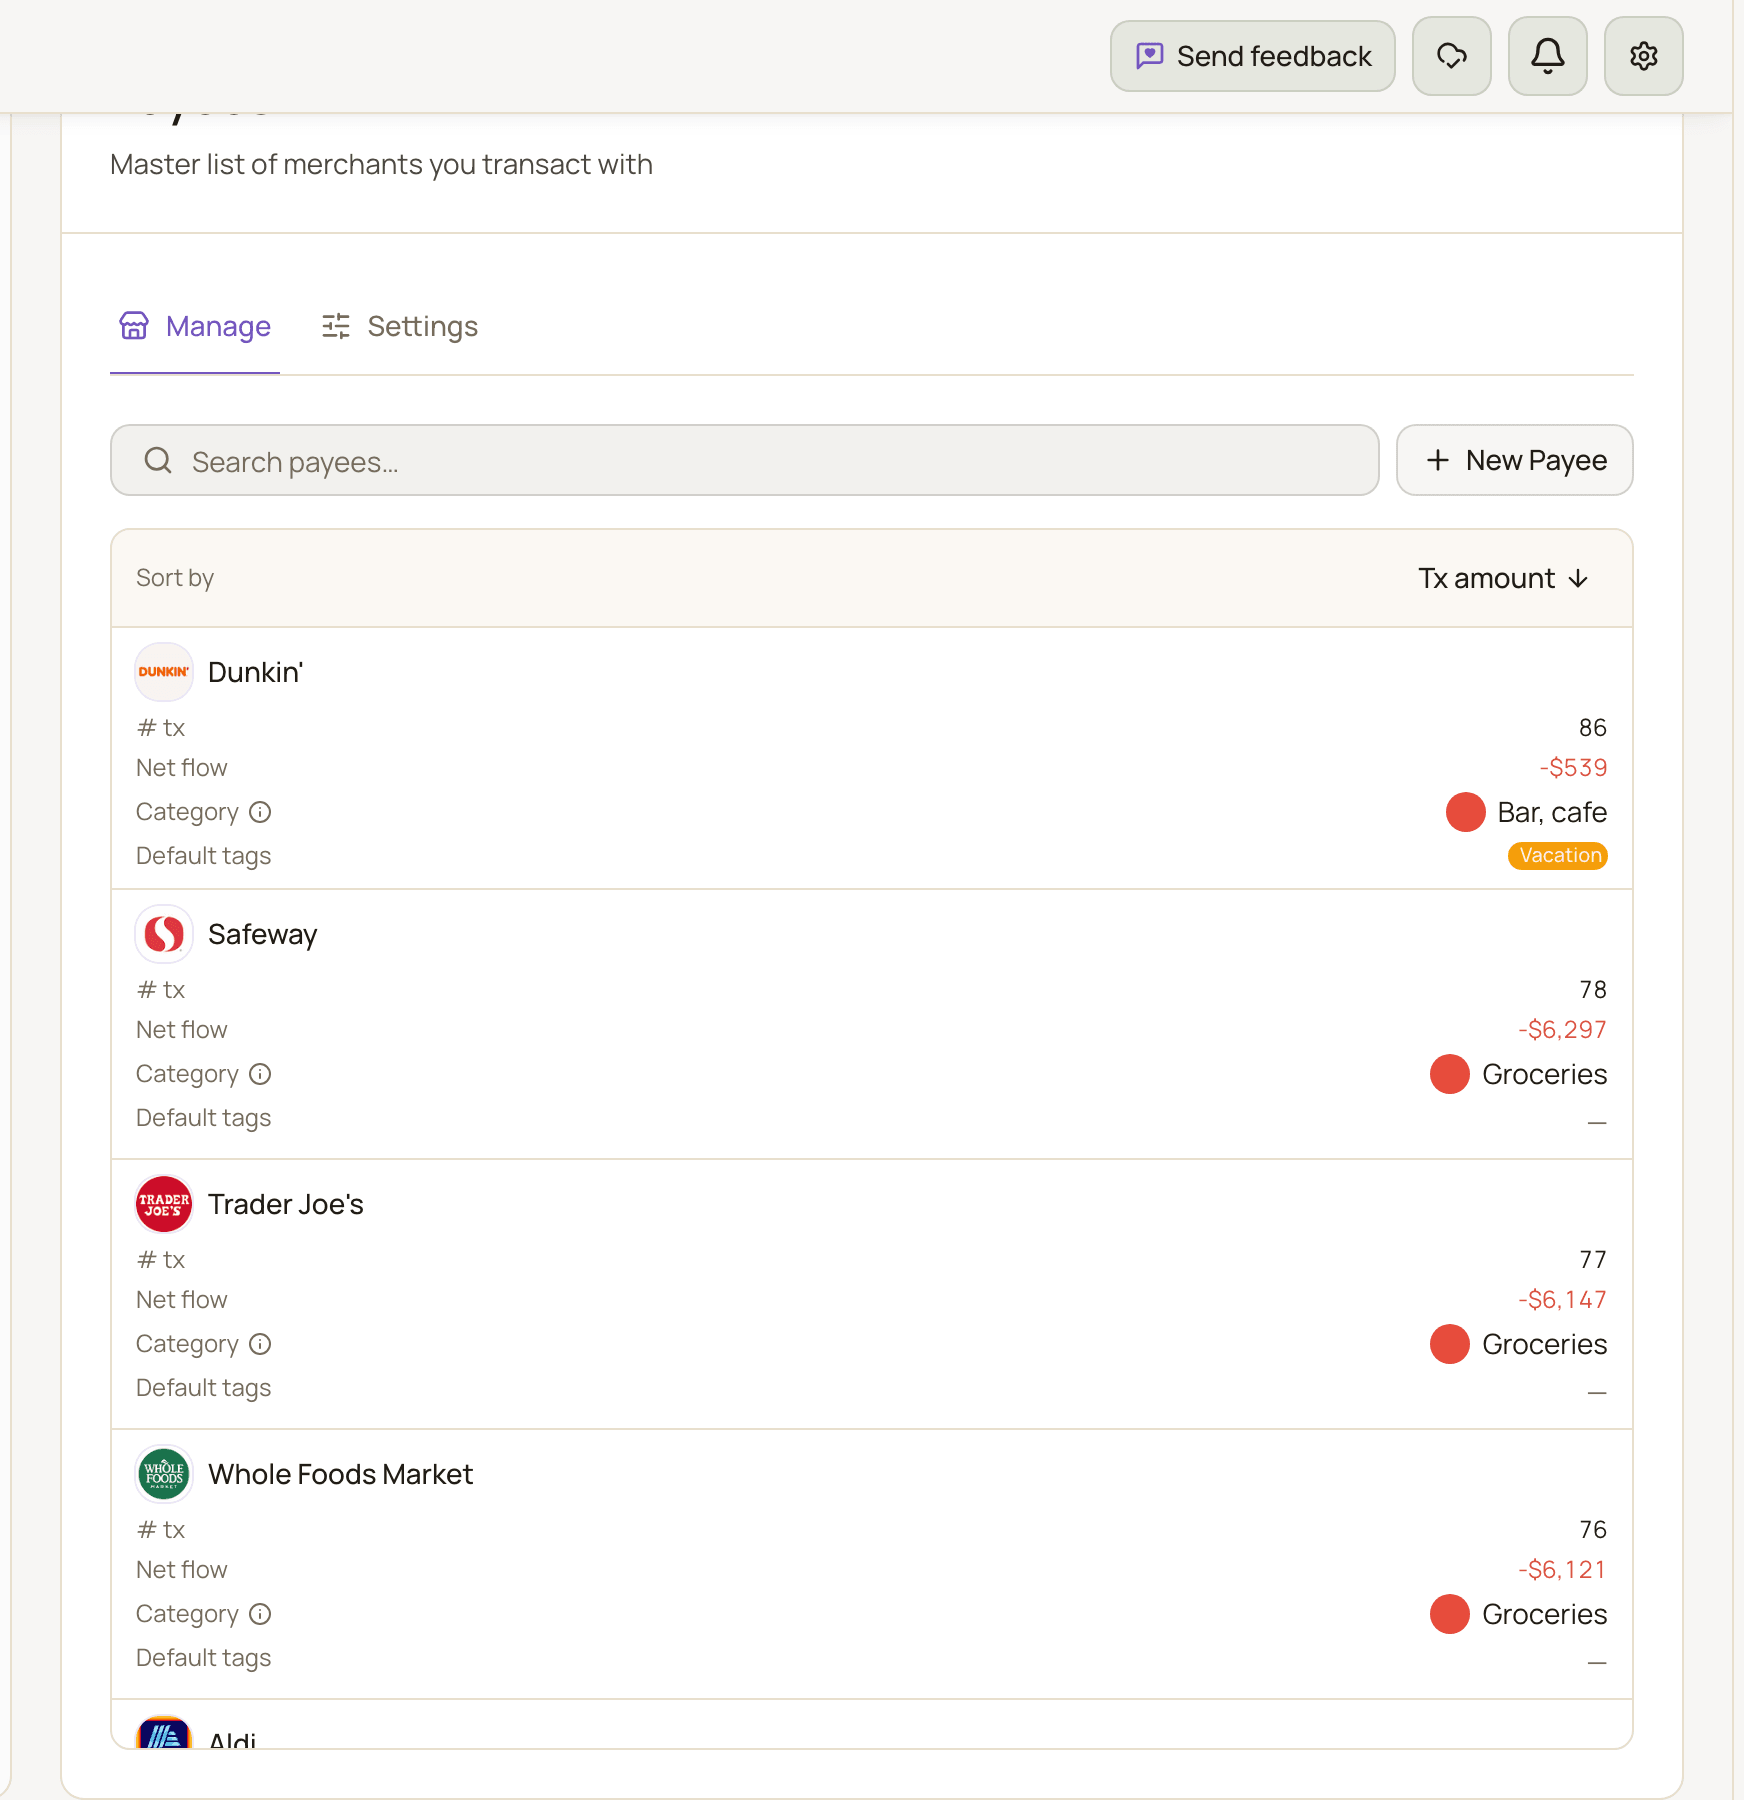
Section titled “The payee list”The Manage tab lists every payee with these columns:
- Name
- # tx: how many transactions are linked to it.
- Net flow: money received minus money spent with this payee, in your base currency. Spending shows as a negative number.
- Category: the payee’s default category if it has one, otherwise the category you use most often with it.
- Default tags: its auto-apply tags.
Click a column header to sort, or use Search payees… to find one. The list starts sorted by # tx, busiest payee first.
The numbers only count real income and expenses. Transfers between your accounts, balance adjustments and accounts you’ve excluded from stats are left out, because none of them is money you actually exchanged with the payee.

Create a payee
Section titled “Create a payee”- On the Manage tab, click New Payee.
- Enter the Name.
- Optionally pick a Logo. Typing the company’s website, such as amazon.com, finds the right brand.
- Optionally choose a Default category (see below).
- Click Save.
You can also create a payee straight from the transaction form: type a name in Payee and click Create payee ”…”.
Payee names must be unique. When comparing names, MoneyMatter ignores upper and lower case, accents and punctuation, so “Café-Bar #1” and “cafe bar 1” count as the same name.
The payee page
Section titled “The payee page”Click a payee in the list to open its page. It shows:
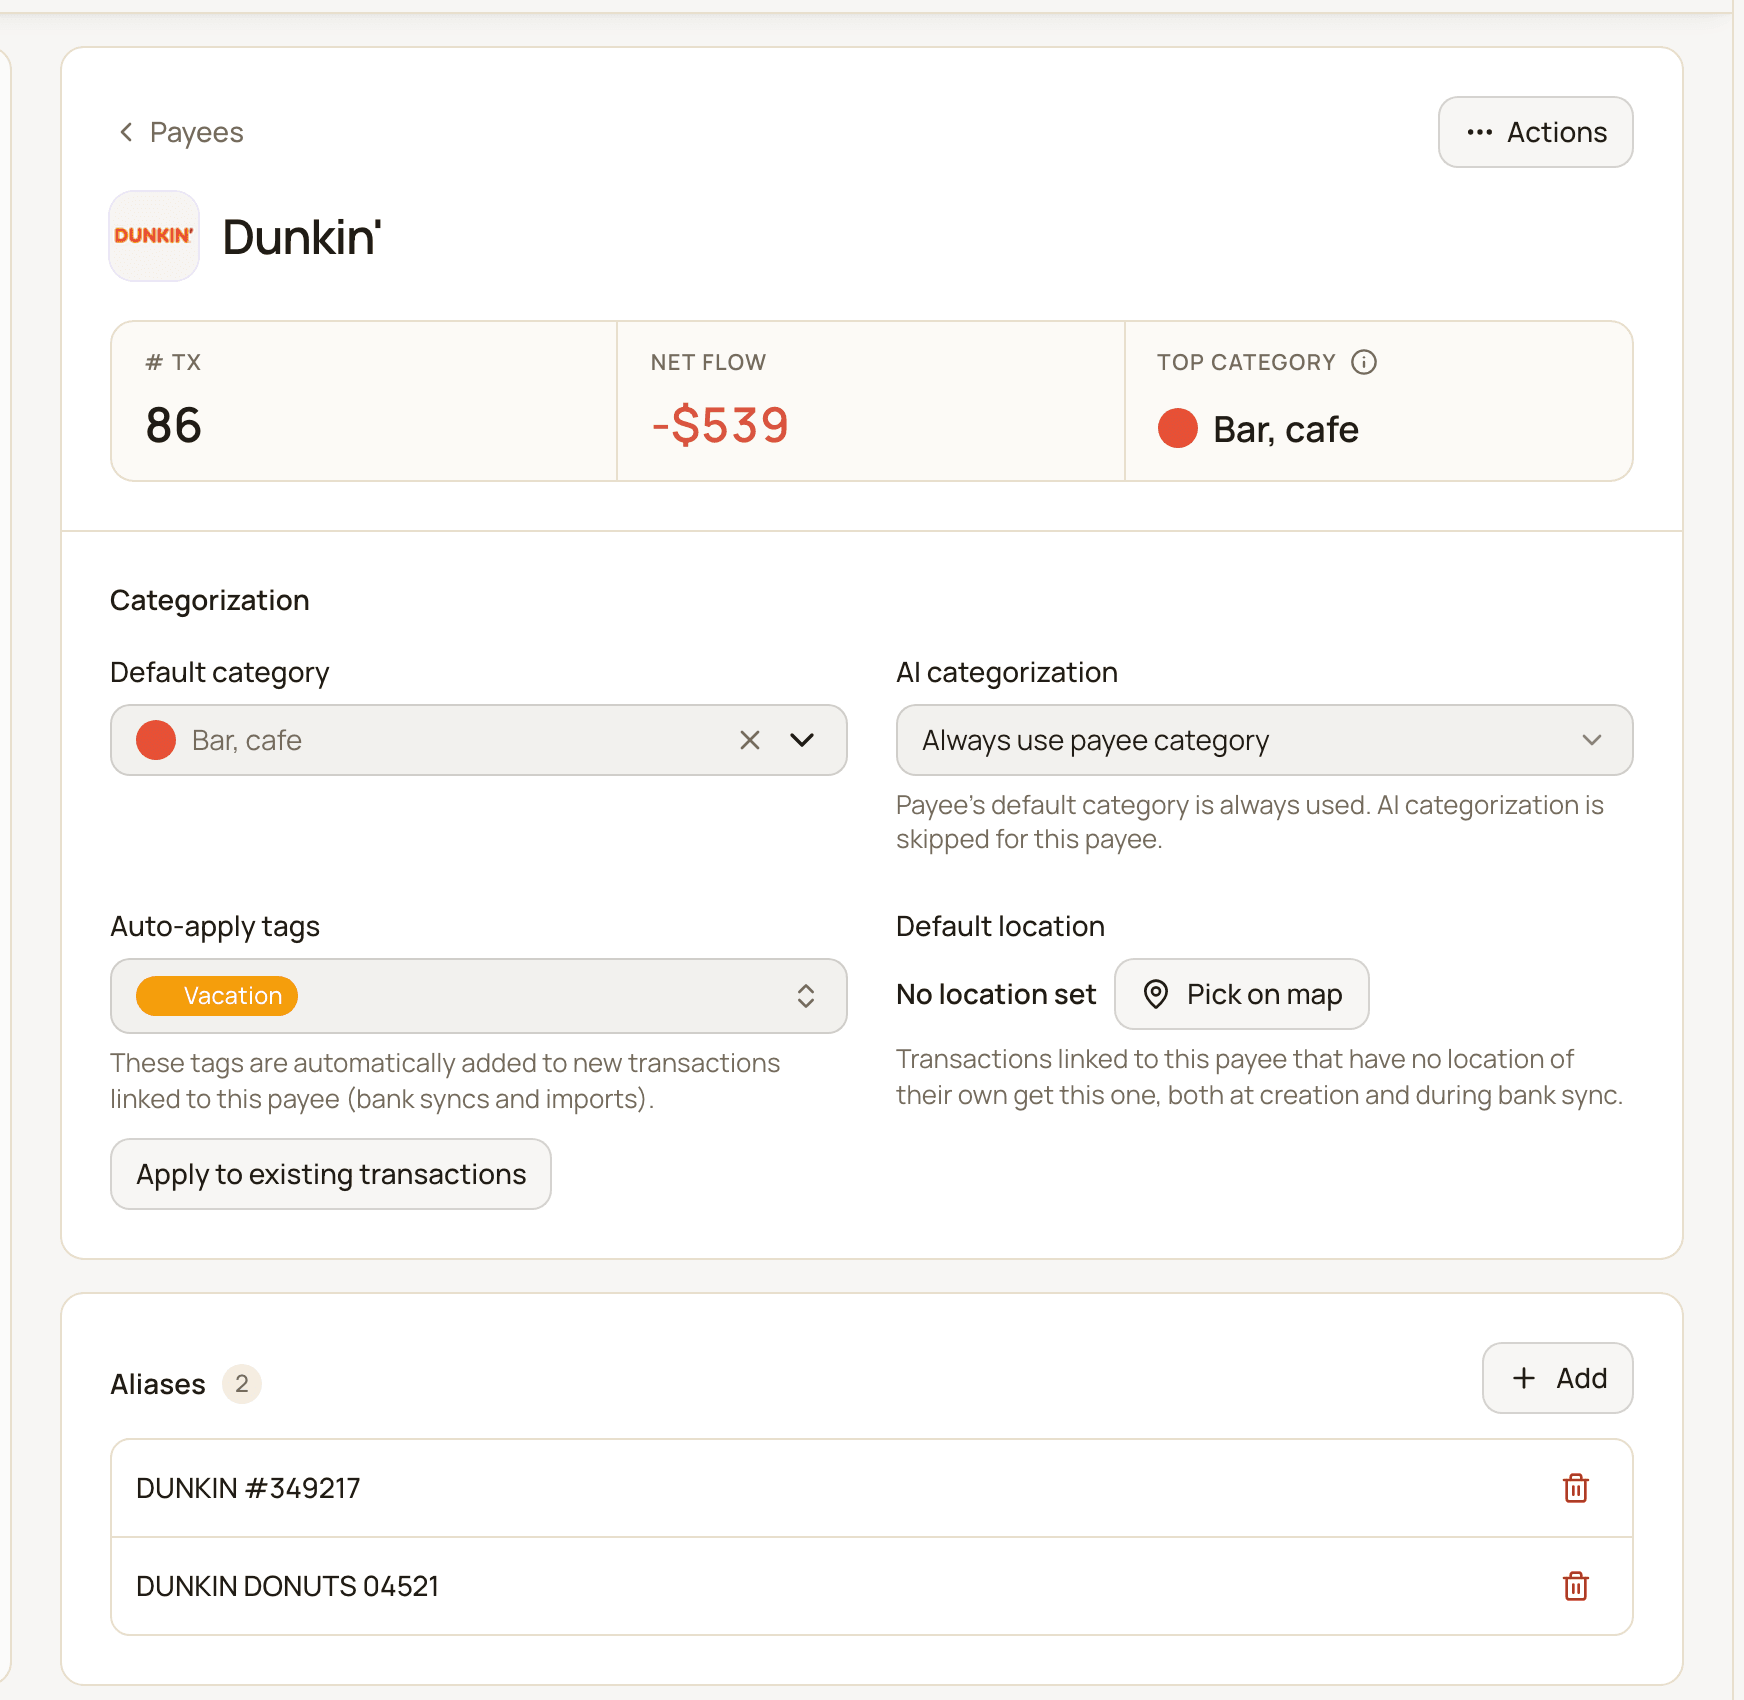
- # tx, Net flow and Top category (the category you use most with this payee). Click # tx to see the linked transactions.
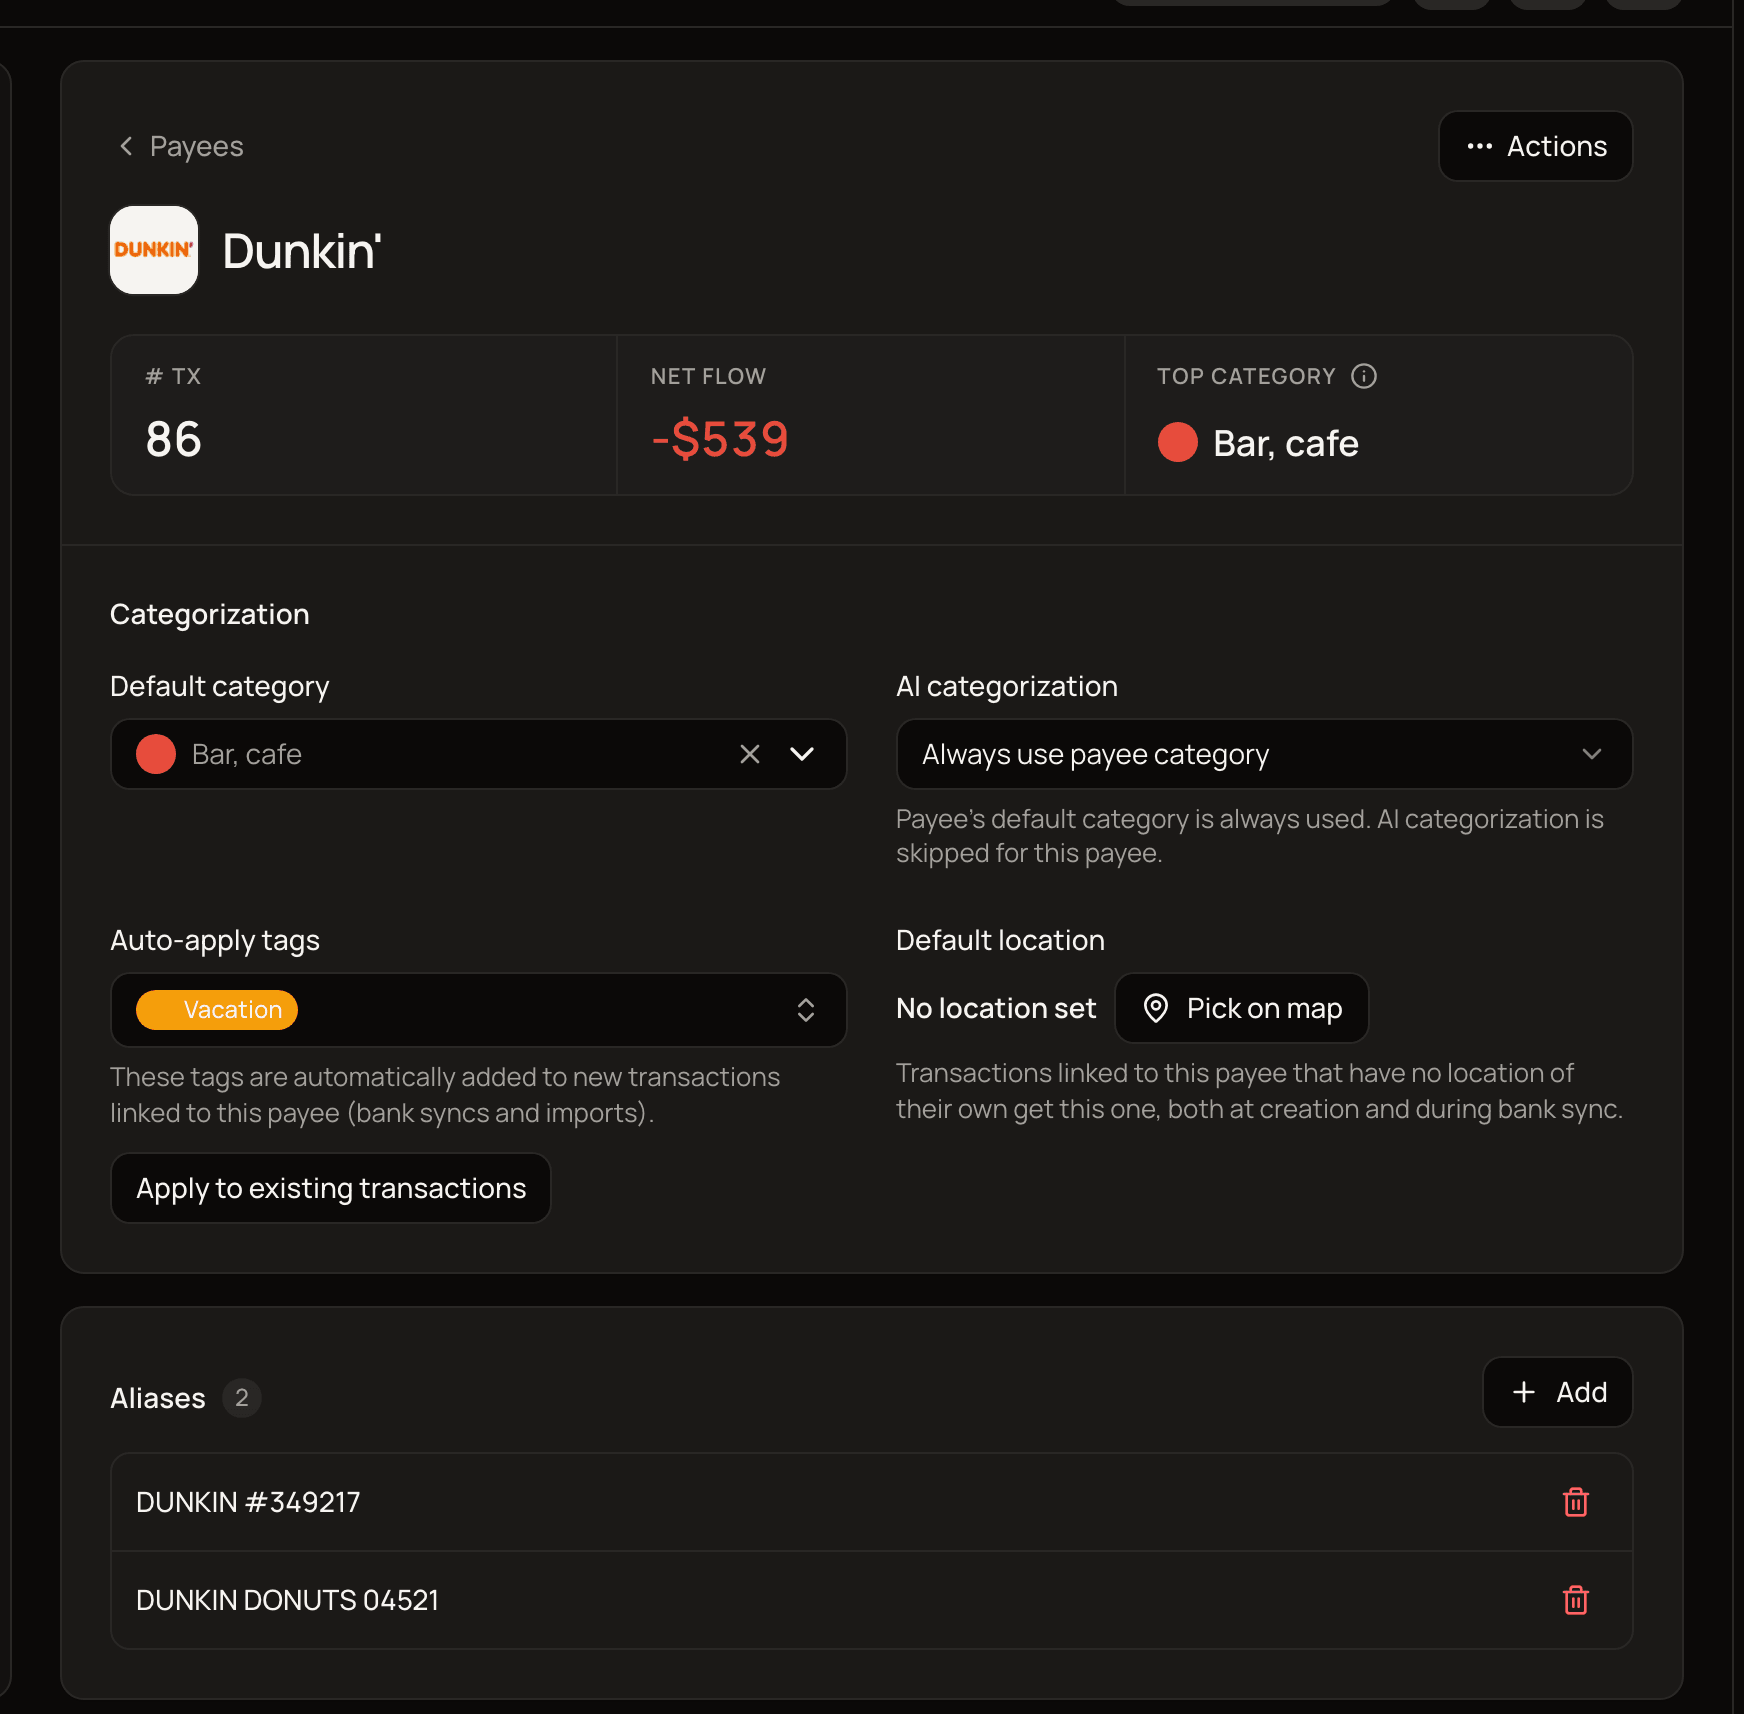
- The Categorization section: Default category, the categorization setting, Auto-apply tags and Default location.
- Aliases: other spellings that link to this payee.
- An Actions menu with Rename, Merge into…, Delete and Delete & ignore.
- The logo, which you can replace with Change logo.
Changes in the Categorization section save as soon as you make them. There’s no Save button.
Default category and auto-apply tags
Section titled “Default category and auto-apply tags”Default category
Section titled “Default category”A payee’s Default category is used for new transactions linked to it, whether you add them by hand, they arrive from your bank, or you import them (unless the imported file already sets a category for that row, in which case the file’s category is kept). How strictly depends on the setting below it, labelled AI categorization:
- Always use payee category (the default): new transactions get the default category, and AI categorization leaves them alone.
- Use as a hint: new transactions get the default category too, but AI categorization can still replace it based on the transaction’s details. This suits catch-all shops like a big online store.
- Off: the default category is never applied automatically. Picking the payee in the transaction form still suggests it, and you can change it before saving.
In the transaction form, picking a payee fills in its default category, or its Top category if it has no default. That only happens if you haven’t chosen a category yourself yet.
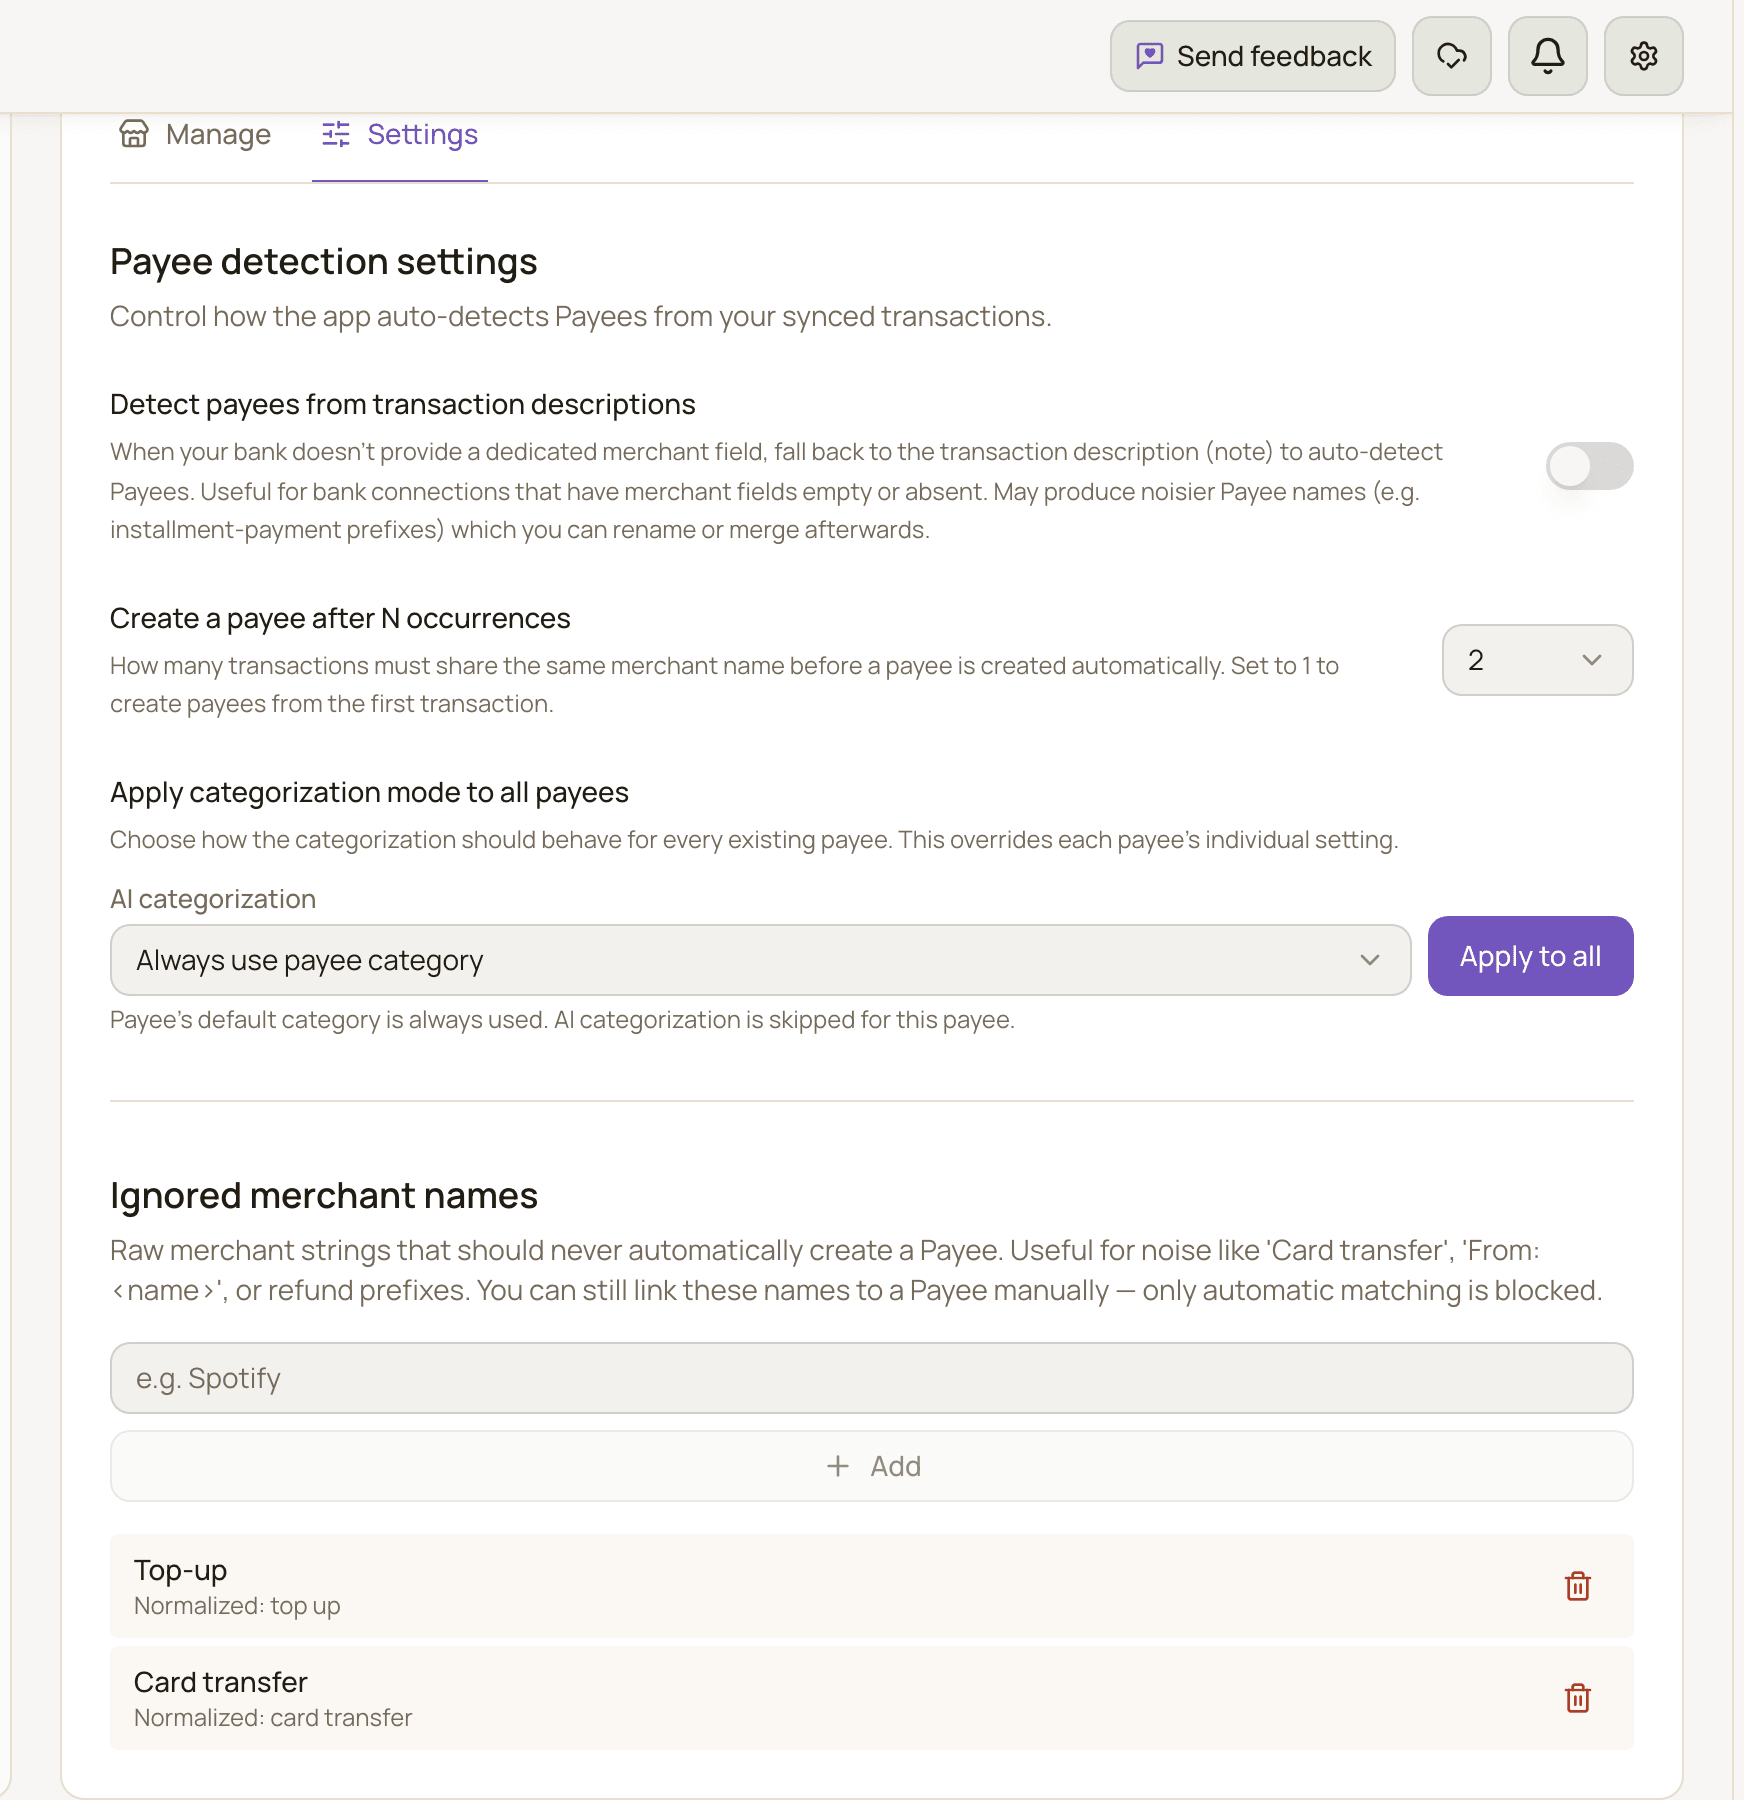
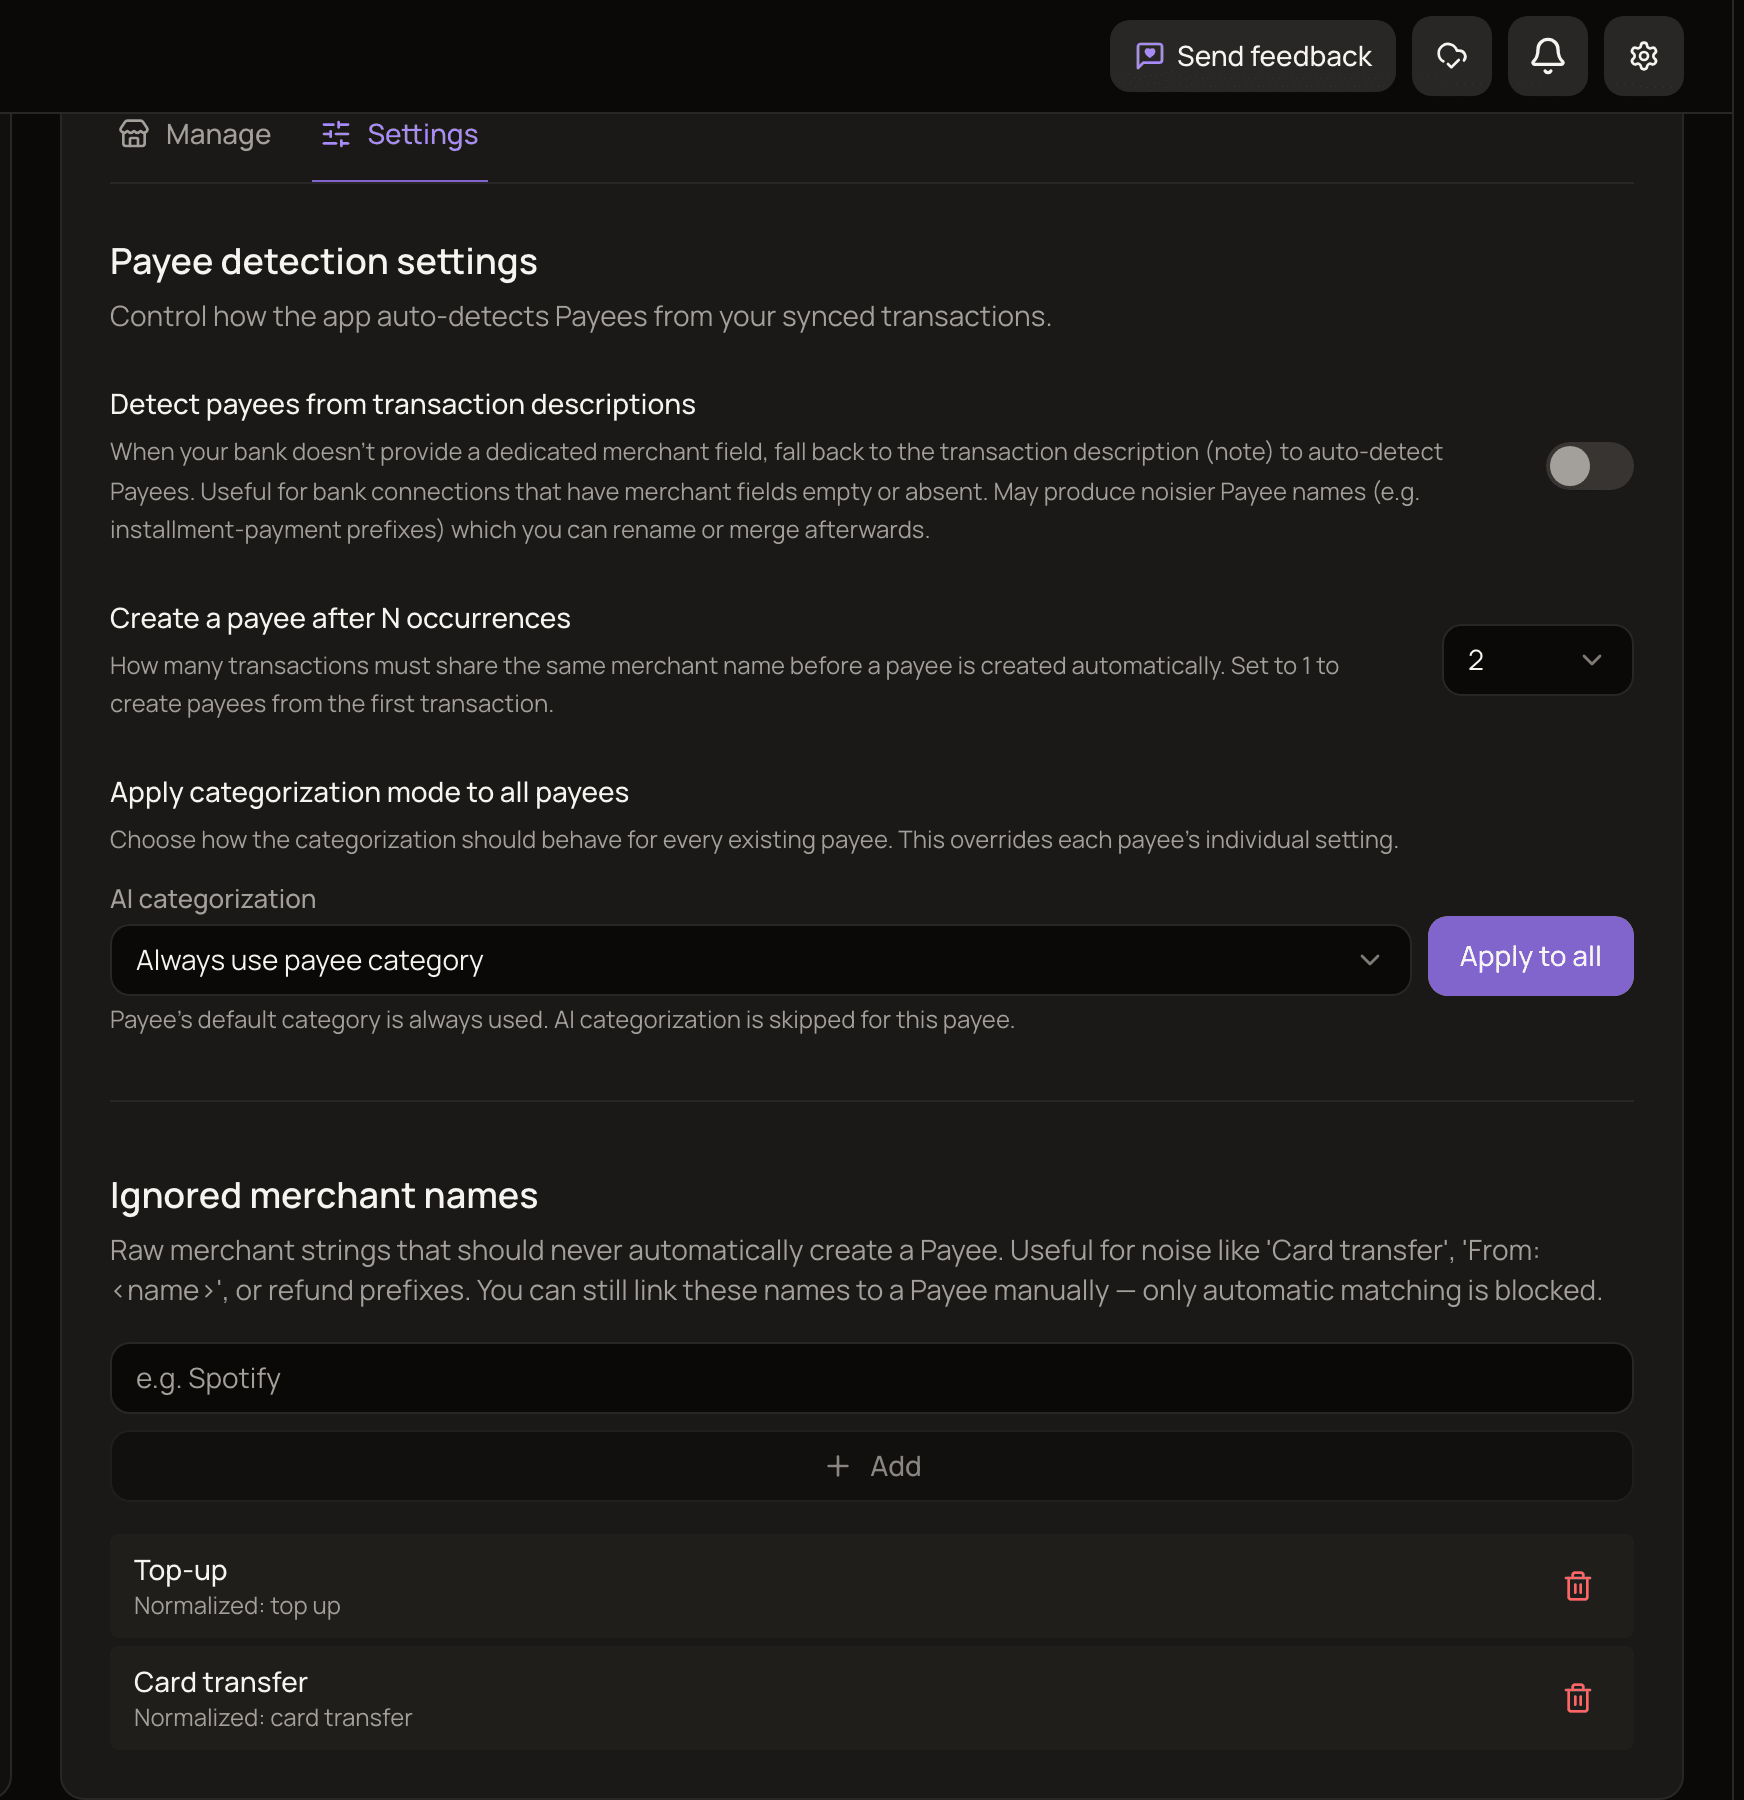
To switch every payee to the same mode at once, go to the Settings tab, pick a mode under Apply categorization mode to all payees and click Apply to all. You can still change individual payees afterwards.
Auto-apply tags
Section titled “Auto-apply tags”Auto-apply tags are added to new transactions linked to the payee, including bank-synced and imported ones. They’re also added when you pick the payee in the transaction form, where you can remove them before saving.
To tag the payee’s past transactions too, click Apply to existing transactions. It only adds the tags; it never removes tags a transaction already has.
Default location
Section titled “Default location”Transactions linked to the payee that have no location of their own get the Default location, both when they’re created and when they arrive through bank sync. Removing it doesn’t change transactions that already have it.
Automatic payee detection
Section titled “Automatic payee detection”When a transaction arrives from a bank connection or an import, MoneyMatter reads the merchant name and tries to link it to a payee:
- Exact match. If the name matches a payee’s name or one of its aliases, ignoring case, accents and punctuation, it’s linked.
- Ignored names. If the name is on your ignored list, it stops here and the transaction is left without a payee. Because the exact match comes first, an ignored name that exactly matches an existing payee or alias still links to it.
- Close match. If the name is very similar to an existing payee, it’s linked, and the new spelling is saved as an alias so it matches exactly next time.
- New payee. Otherwise, once enough transactions share the same unknown name, a new payee is created and all of those transactions are linked to it.
Detection never touches:
- Transfers you create between your own accounts aren’t matched to a payee. A transaction that already has a payee keeps it if you turn it into a transfer, but transfers never count toward a payee’s # tx or Net flow.
- Transactions whose payee you set or cleared yourself. Your choice is locked on that transaction.
Detection settings
Section titled “Detection settings”On the Settings tab of the Payees page:
- Detect payees from transaction descriptions: some banks don’t send a separate merchant name. Turn this on to use the transaction’s description instead. Off by default. This also applies to transactions you add by hand without choosing a payee: their note is used to find or create a payee, and that payee’s default category is then applied as described above.
- Create a payee after N occurrences: how many transactions must share an unknown name before a payee is created: 1, 2 or 3. The default is 2, which avoids creating a payee for a one-off name. Choose 1 to create payees from the first transaction.
- Ignored merchant names: names that should never turn into a payee automatically, such as “Card transfer”. Type the name and click Add. You can still link transactions with that name to a payee by hand.
If you add an ignored name that matches an existing payee, MoneyMatter offers Delete Payee and ignore. The payee is deleted; its transactions stay but lose the link.
Aliases
Section titled “Aliases”An alias is another spelling of a payee’s name, such as “AMZN Mktp” for Amazon. Bank transactions that match an alias link to the payee automatically.
To add one, click Add in the Aliases card, type the Merchant name and confirm. It works for future transactions only; past transactions aren’t changed.
- An alias can belong to only one payee.
- The alias that matches the payee’s own name can’t be removed. Rename the payee instead.
- Removing an alias keeps the transactions that are already linked.
Rename a payee
Section titled “Rename a payee”Open Actions → Rename, change the Name and click Save. The old name is kept as an alias, so bank transactions that still use it keep linking to this payee.
If another payee already uses the new name, you’ll be asked to merge them instead.
Merge payees
Section titled “Merge payees”When the same shop ended up as two payees, merge them.
- Open the payee you want to get rid of.
- Click Actions → Merge into….
- Pick the payee to keep and click Merge.
What happens:
- All transactions of the merged payee move to the one you keep, and so do templates that used it.
- Its name and aliases become aliases of the payee you keep, so future bank transactions link correctly.
- Its auto-apply tags are added to the kept payee’s tags.
- The kept payee’s default category stays; the other one’s is dropped.
- The merged payee is deleted.
Delete a payee
Section titled “Delete a payee”Open Actions and choose one of:
- Delete: removes the payee and its aliases. Its transactions stay, with their categories, but no longer have a payee. If new bank or imported transactions keep arriving with this merchant name, MoneyMatter can create the payee again and re-link the old transactions. Use Delete & ignore to stop that.
- Delete & ignore: does the same, and also adds the payee’s name and all its aliases to your ignored names, so automatic detection won’t create it again.
Neither can be undone.
Unlink a transaction
Section titled “Unlink a transaction”To take one transaction away from a payee, open the payee page, click # tx, and click Unlink from payee next to the transaction. Future bank syncs won’t link it back.
You can also change or clear the Payee in the transaction form.